Fundamentals: 1 Point Perspective

Goals and Outcomes:
- learn to understand the perspective space
- learn the anatomy of perspective
- learn how to make careful and precise measurements in perspective
- learn how to manipulate basic primitives into forms
- see how to affect the viewers POV
- follow along with an applied project
- measure exact angled slopes
- plot shadows
- and more …
You will learn all the essential concepts and processes of 1 point perspective including drawing squared grids, perfect cubes, ellipses, circles, arches, slopes, lighting basics, dealing with a variety of applied situations, and applying 1 point perspective to a composition in a series of 50+ video lessons and assignments!
Watch each video once through first, calmly listen, then watch and try out the processes. After most every theoretical lesson, there is now a practical follow along project! Use the theory to build a house using the ideas from the lessons in a real world situation and master 1 Point Perspective!
Anatomy of 1 Point Perspective
Anatomy of Perspective Pt01
0
Anatomy of Perspective Pt02
0
Traditional Tools: Set Up the Perspective Space
0
Follow Along 01: Setup
0
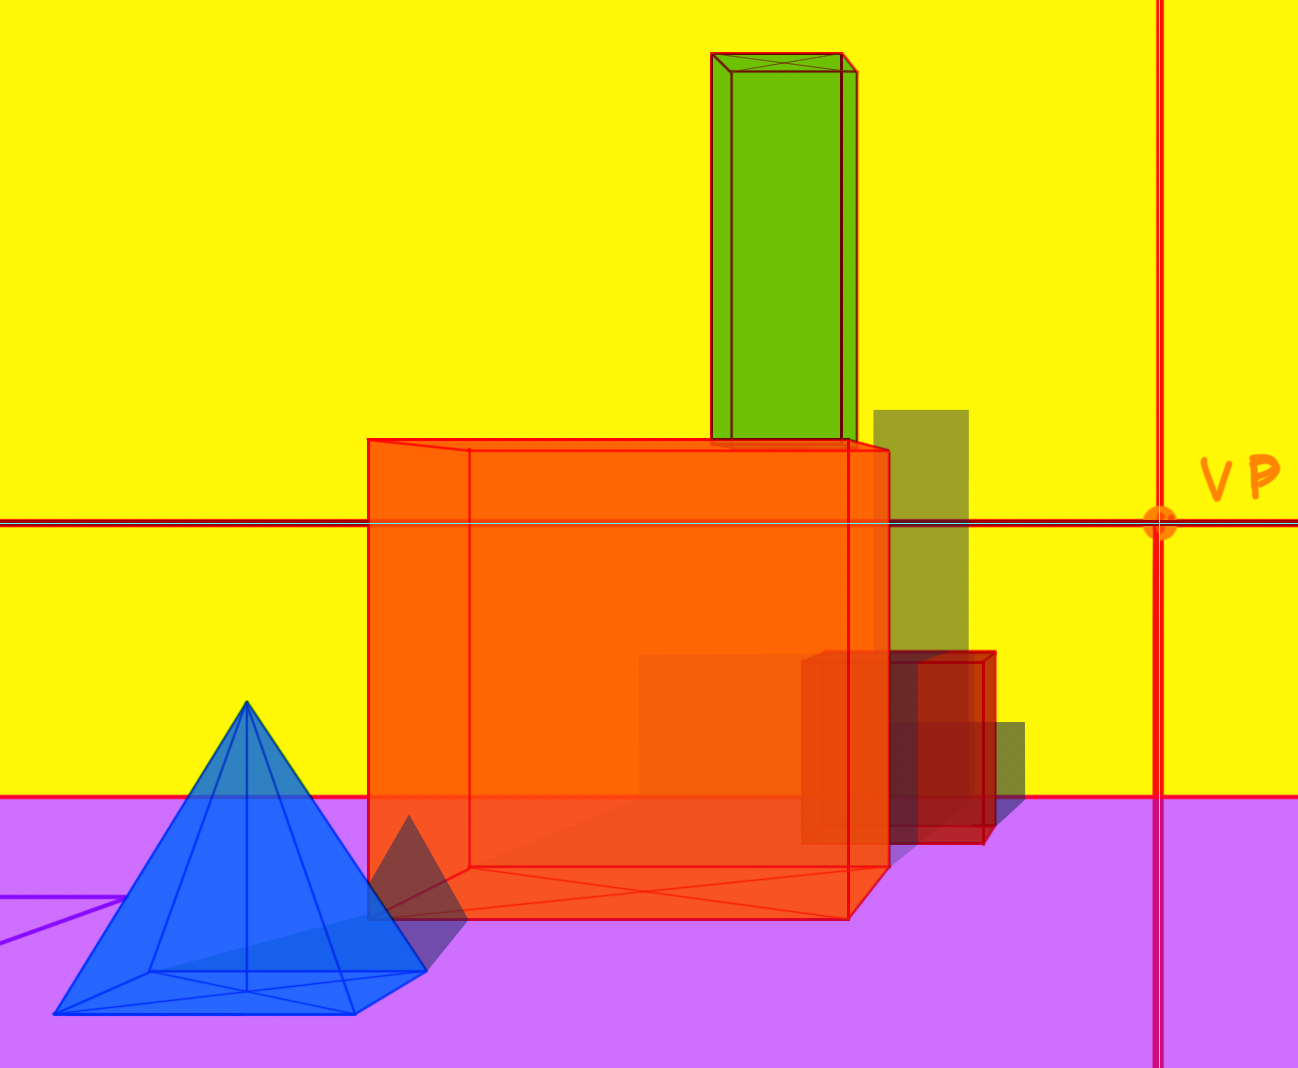
Square Grids & Cubes
Grids & Perfect Squares
0
Follow Along 02: Grid Layout
0
Perfect Cubes
0
Follow Along 03: Cubes
0
Traditional Tools: Grids & Cubes
0
Slopes & Angles
Slopes, VVP, & Precise Angles
0
Slopes & Mirrored Angled Roofs
0
Follow Along 04: Slopes
0
Steps & Stairs
0
Follow Along 05: Roofs
0
F.A.L.06: Steps
0
Circles & Ellipses
Circles & Ellipses
0
Traditional Tools: Ellipses & Circles
0
Embedded Ellipses
0
Follow Along 07: Circles
0
Follow Along 08: Embed Ellipses
0
Cones & Spheres
0
Follow Along 09: Cones
0
Arches & Depth
0
Follow Along 10: Arches
0
Space, Distance & Location
Irregular Measuring Lines & Elevations
0
Subdividing Space
0
Follow Along 11: Measuring Lines & Elevations
0
Follow Along 12: Subdividing Space
0
Measuring Distance & Locations
0
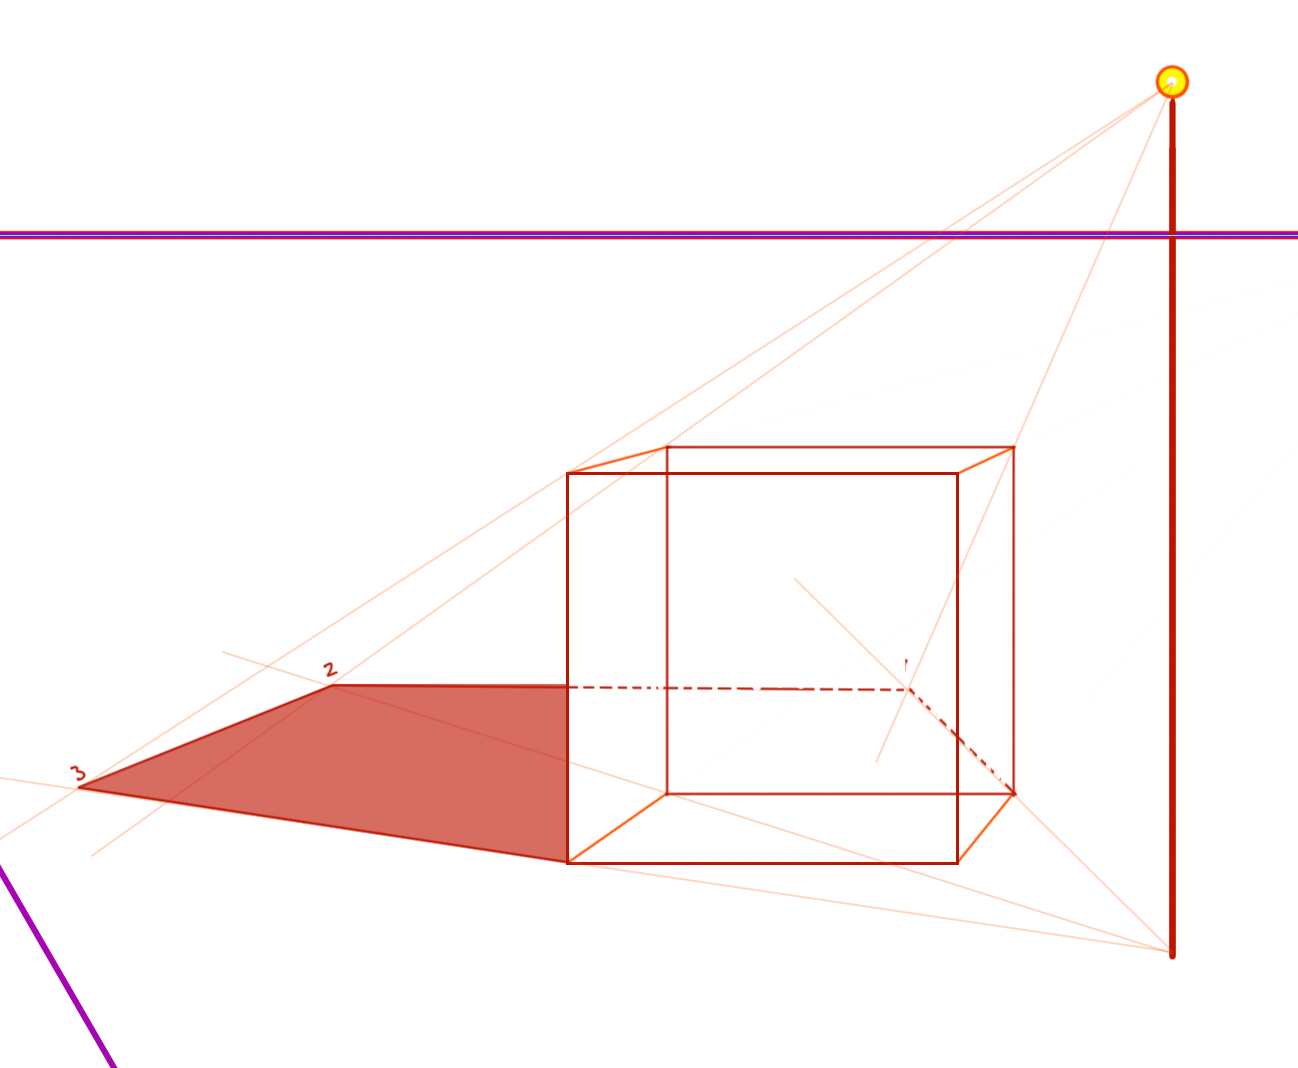
Lighting Fundamentals
Lighting Fundamentals
1
Lighting Pyramids, Cones & Cylinders
0
Lighting Spheres
0
Lighting from Behind the Viewer
0
Lighting Compound objects
0
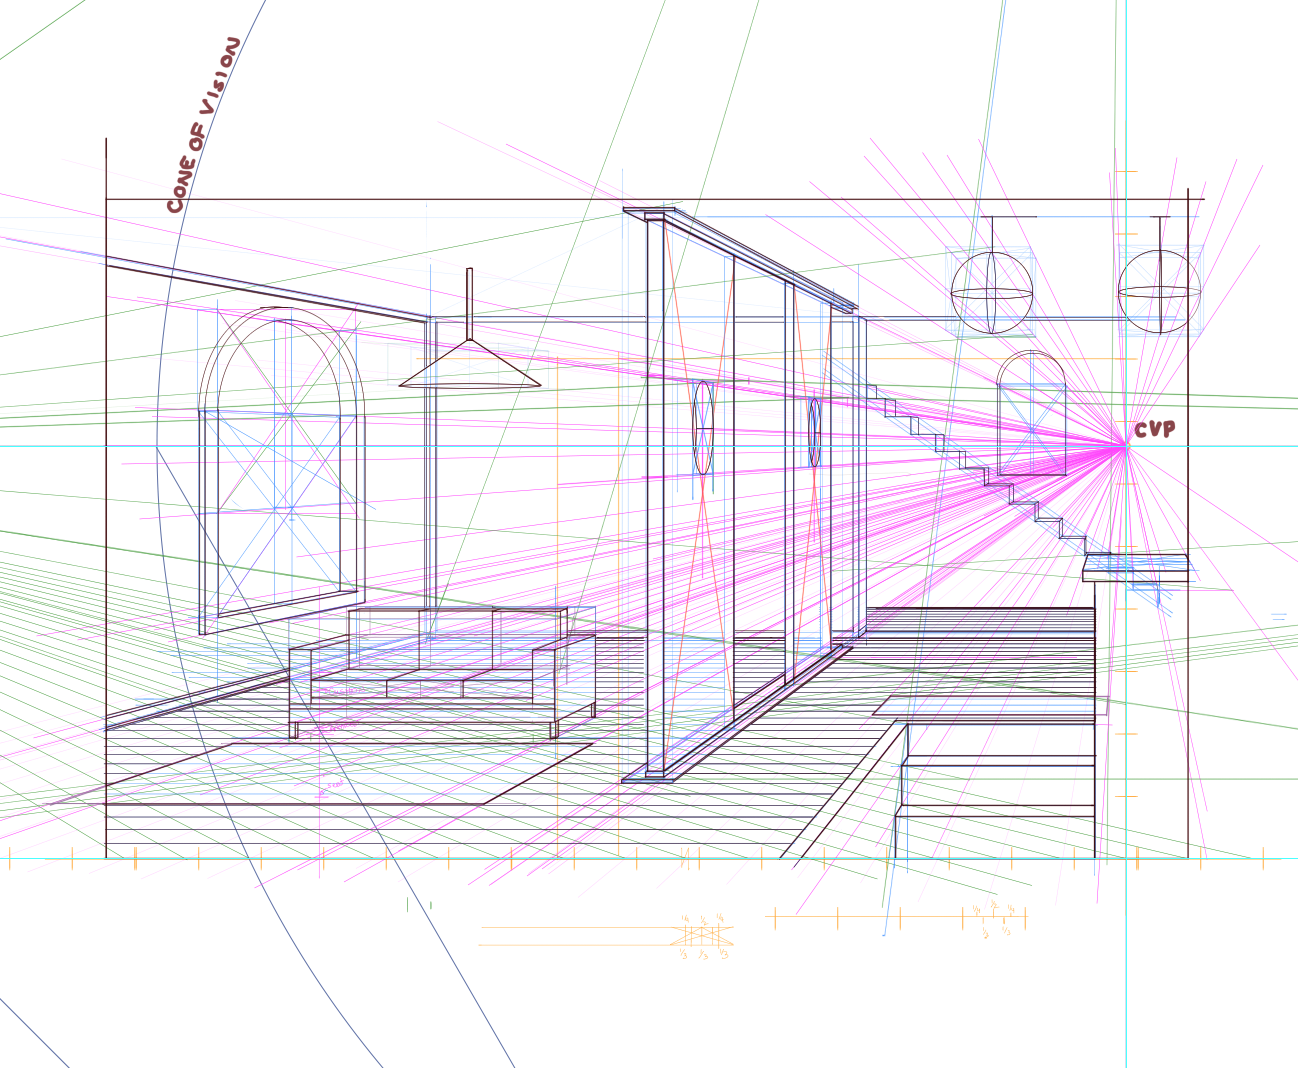
Applied 1 Pt: Build A Simple Interior
A Simple Interior Pt01
0
A Simple Interior Pt02
0
BONUS: Finished Interior Timelapse
0
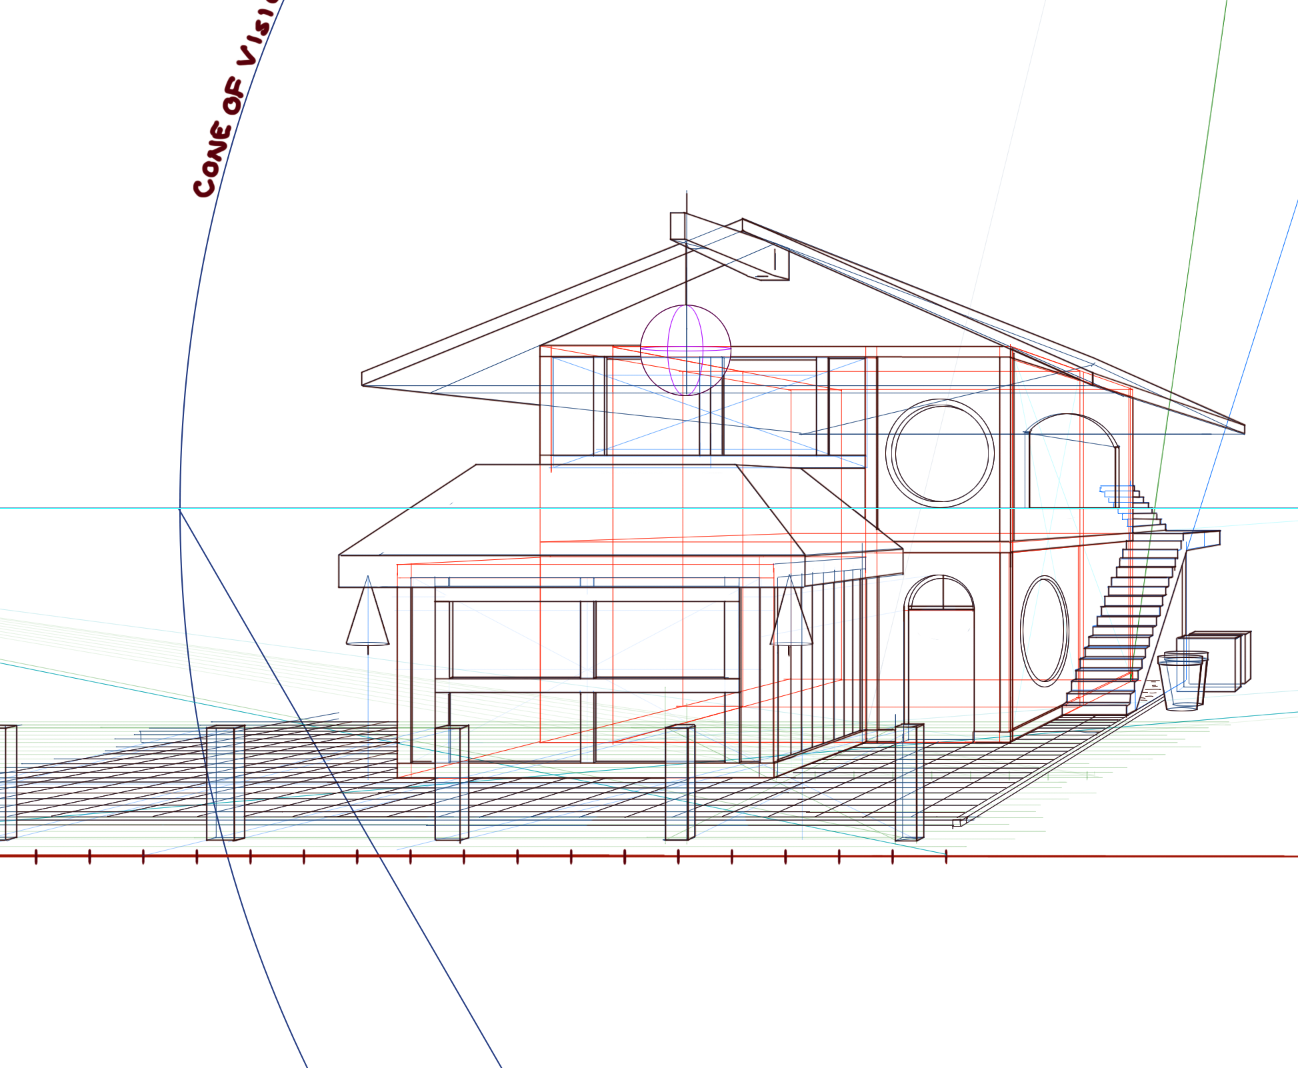
Applied 1 Pt: Construct a Simple Building
A Simple Building Pt01
0
A Simple Building Pt02
0
A Simple Building Pt03
0
BONUS: Completed Painting Timelapse
0
Applied 1 Pt: Architectural Projection
Introduction to Architectural Projection
0
Create the Schematics
0
Project a Simple House Pt01
0
Project a Simple House Pt02
0
Project a Simple House Pt03
0
BONUS: Detailing, Inking & Coloring Timelapse
0
Applied 1 Pt: Composition & 1 Point Perspective
Composition & Perspective Pt01
0
Composition & Perspective Pt02
0
Composition & Perspective Pt03
0
Composition & Perspective Pt04
0
BONUS: Finished Illustration Timelapse
0
Conclusion
Conclusion
0